Saturday, December 21, 2013

I spy the year 2013...


As has been my tradition for the past 6 or so years, I present you will my yearly i spy.  Find the underlined objects

A cross on a rosary for Jack's first communion,
Cucumbers for my somewhat successful garden,
Surfboard - for our wonderful family vacation to Destin, Florida,
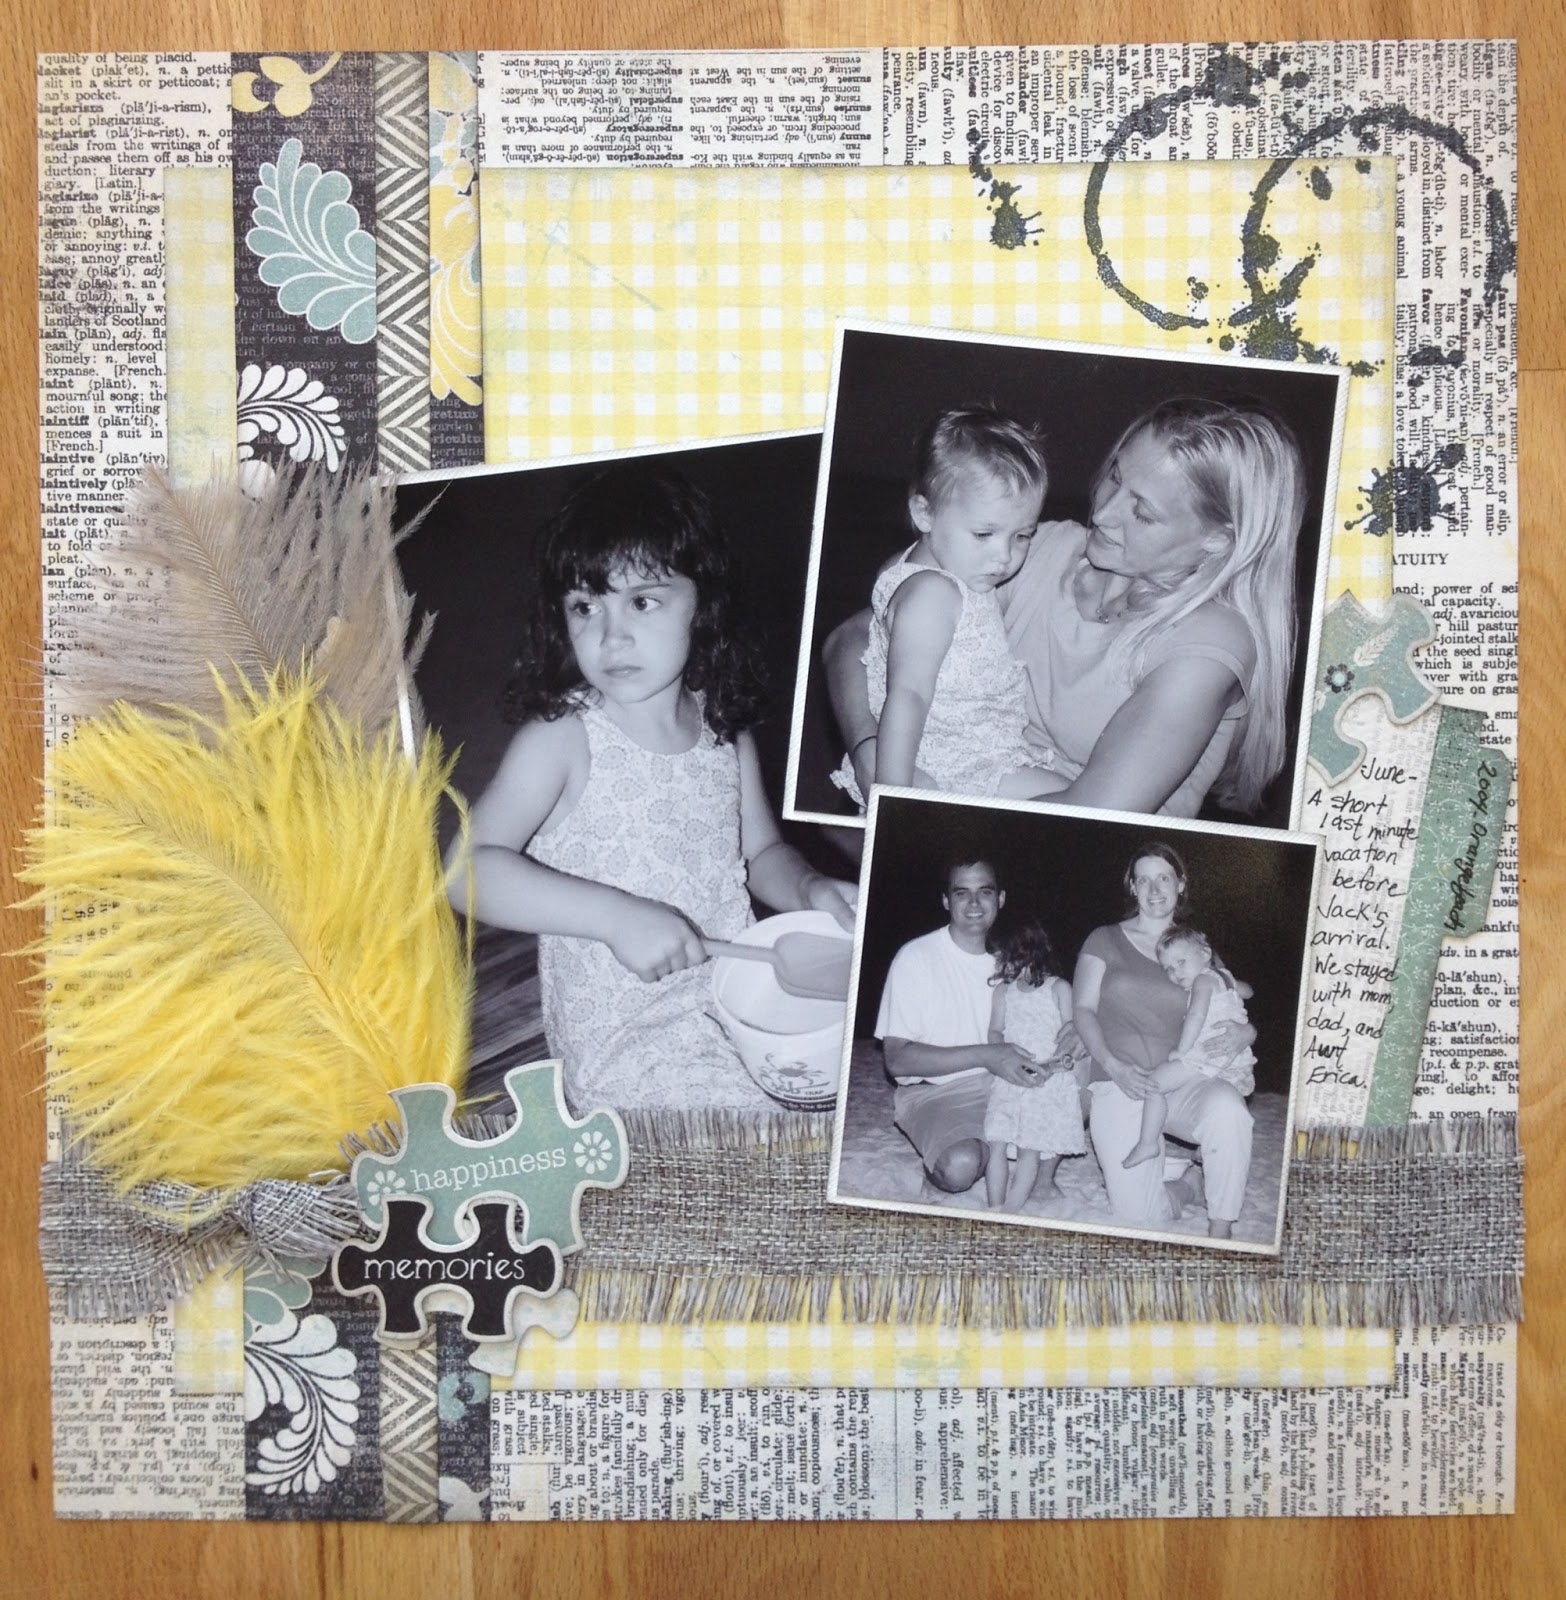
A tiny me looking at Yellow and blue paper at the craft and hobby show in California,
A hospital bracelet from Abby's unexpected appendectomy,
A purple flower from my sister's wedding
Daisy earrings - Emma had her ears pierced,
a red car - we had to get 2 new to us cars this year :( the real ones are nothing like this corvette,
Three balls, the girls are playing lots of volleyball and Jack played basketball, but his favorite ball is hidden a bit..,
A running shoe of abby's and three of Emma's many ribbons,

too easy you say... then try these

Blog bonus clues -
2 monkeys and 11 other animals
a pink snowflake
3 hats (the gold miners helmet is not a hat...)
3 scarves
a star

I wish my picture and clues were slightly more creative this year, but the holiday crunch has crunched me this year.  Next year i will start earlier...maybe.


Wednesday, April 3, 2013

Time for Tim's Clock


I have spent the last day playing with all sorts for fun products while creating the clock sample for my class on the 27th.  I am really pleased with how it turned out! Here are a few pictures...


Of course I will wait until the class to give all the details but here is a list of products used:
idea-ology Assemblage Clock
idea-ology 8x8 collage paper stash
idea-ology word bands
idea-ology tag labels
idea-ology chitchat stickers
idea-ology ball chain
idea-ology  filmstrip
idea-ology memo pins
idea-ology stencil marks
idea-ology rub-ons
Maya Road vintage buttermilk tu-tu tulle
Sizzix Bird Branch
Sizzix Movers and shapers camera
Prima flowers
Vintage Patina Inks in verdigris, moss, aged bronze and antique copper
Distress Inks in tea dye and vintage photo
Ranger Black Archival Ink
Silver Metalic Distress Stain
Studio Matte Medium
Glossy Accents
Rock Candy Dry Glitter
Black Paint
Black dimensional adhesive foam
Super tacky glue

Can't wait for the 27th!
 

Sunday, March 31, 2013

Happy Easter!

Happy chocolate Easter bunny!


 I thought I would say Happy Easter with my version of Tim's Tag.  I have had this made for a while, but just now getting around to posting it!  I gave my new distress paints a try on flowers I cut using the tattered floral strip die.  I also colored pins and brads as well.  I loved how the paints blended so easily.  And I could get a lot of variety from just a few colors!  I used peeled paint, broken china, barn door, and antique linen.

Next, I colored my silk binding.  The worn lipstick was too bright at first so I mixed a bit of picket fence.  I had never used the picket fence on the ribbon before but I really liked the "creamy" opaqueness it created.  I added some paper and a little grass and distressed with my sanding block.    For the I used my movers and shapers ornate frame and an egg die from my x-cut nesting egg set.  I tied a little bow with silk binding and added it with glossy accents.


All that was really left was to stamp my sentiment and do the final assembly.  I centered the frame over a cute image in the paper and mounted the frame with adhesive foam.  Well I hope everyone enjoyed their Easter and isn't sick from all the candy!


Saturday, March 30, 2013

Rock Candy - YUM!

Erica and Nathan
So much for keeping up with this blog.... the last month has been filled with wedding activities and  I have completely neglected the blog :(  Here is a picture of the lovely bride (my sister erica) and her new husband Nathan.  Here's to many more beautiful days like that one.  
But now back to work and a blog post.  This week my adorable nephew Noah turns 7 and I have been wanting to try Rock Candy Dry Stickles on top of grunge board.  This technique was featured on the Tim Holtz Idea-ology make and take at CHA this year.  See the black eiffel tower--->  So I thought I would give it a try with the letters of his name.  Below is the card I made for him using Echo Park's Scoot Element Sticker Sheet and stripe paper.  The technique on the grunge is to first cut the grunge using my wordplay die.  then you cover in glossy accents and sprinkle with rock candy dry stickles.  Make sure to not push the grunge into the glitter.  I did that on the first try and it was smooshed and ugly... 


Once the glossy accents is completely dry then I colored with Copics.  I was planning to use alcohol inks but I didn't have the right colors that I was going for, so I turned to copics and it worked great.  (I used B29, G05, Y08 and R29)


Noah


I also used Lawn Fawns Flying By stamp and Lawn Cuts, along with Peppermint Lawn Trimmings.  With kids cards I like to decorate the inside of the card too.  and I just added a couple to the stickers from that set - they are really cute stickers don't you think?!?!


Well happy birthday kiddo!  And here's to me not taking a month and a half to make another blog post!

Saturday, February 16, 2013

reNEW

It has been a busy couple of weeks at the store.  I have been greeted each day by what seems like an endless parade of UPS and FEDEX men.  It is always a good time when new papers arrive and I am motivated once again to return to my scrapbooking.  I seem to always be behind in printing current pictures so I flipped through a few of the girls' old albums in serach of something that had not yet been scrapbooked.  I came across these black and white photos from a quick beach vacation a couple months before jack was born.  I thought they would be great with one of my favorite new paper collections - RENEW by Authentique.


I was also excited to use the stain stamp from BoBunny - don't you love the ring stains at the top right corner.  And of course I needed to open up a few feathers from Bella Blvd and use a bit of smoke colored burlap from Maya Rd.

Supply list:
Authentique Flourish
Authentique Energize
Authentique Rejuvenate
Authentique Renew mini notes
Authentique Renew Puzzle pieces
Bella Blvd Feathers Bell Pepper and Oyster
Maya Road Smoke Burlap
Bazzill Lily White cardstock
BoBunny Stained texture stamp

Friday, February 1, 2013

Playing with the queen of hearts

I think this is a very fitting first post for me.  I decided to make time today to do a version of Tim's tags.  I love Tim's Tags for the inspiration and ideas they provide.  This set of blueprint stamps has been staring at me for weeks and this was a good excuse to open it up and color on it.  I was a little afraid to try copics on the card stamp at first - they seem more distress marker appropriate, but I thought I would give it a try and love it! I must use the card stamp in the next copic class.


 Here are the basic steps I did.  I sprayed the tag with 2 shades of Tattered Angels glimmer mist (my pink and red distress stains must have grown legs and walked off somewhere!).  I then distressed the edge with Tim's distress tool and inked the edge with black ink.  I stamped the tag with the card stamp.  And also stamped 2 more times on regular white and x-press blend papers.  I cut the queen out of the xpress blend and colored with copics.  I attached her with rolled up glue dots onto the white card.  I then cut out the card out of white, colored the hearts with copics and inked with tea dye. oh and added a little stickles to the hearts. I used some Jenni Bowlin coredinations in black and red, as it was handy, and found a cute saying on the paper "fancied at first sight" in the red.  I embossed the black with craft core using a handwriting embossing folder.   I attached both using glossy accents.  I cut the "2" off the bottom of a 1/2 mini numeral and added to the bottom of the tag.  I used some Bazzill antique paper and some chit chat words to make my cash key.  Mine says "You and Me"  I used red twine to tie it to the tag - but I have to say I really needed the black and white paper string Tim used.  I also added a "kiss" word tag.  I did the same technique for the paper tape ribbon that tim did, but wanted more.  The last touch I added was to color silver tinsel twine with a combination of red pepper adirondak alcohol ink and ruby vintaj patina ink.   Below is a picture of some the supplies I used, but of course if you stop in the store I can show you in more detail!


Lesley


Wednesday, January 30, 2013

I spy 2012

Happy Holidays!

Each year included with my Christmas card is an I Spy to celebrate the fun of the year. This year I am sharing this online for all to enjoy.


Twelve “Mini” Memories of 2012
  1. A construction worker for all the road construction in Bloomington.
  2. Clint’s doppelganger in a tan hat flying a model airplane.
  3. An artist representing the 2 times I saw Tim Holtz this year.
  4. The baker making cakes for Abby’s 13th, Emma’s 10th and Jack’s 8th Birthdays.
  5. A ninja killing the garden. Really I planted a few things and it must have been a ninja and not that I never watered or weeded it!
  6. Jack and Andrew Luck in their rookie football seasons. Jack played for the Boilermakers – how did we get so lucky?
  7. Emma running with the 4th grade Medley Relay. They set a school record and finished in third place out of all 4th grade teams in the Indy CYO league!
  8. Abby holding a trophy for the CYO Cross Country Champions!
  9. A volleyball player and a dragon on the volleyball court. Both Girls played – I am not sure which one is the dragon – or maybe the dragon represents Emma’s coach (me!).
  10. The Tooth Fairy visited Jack several times and he was without his 2 front teeth for at least 6 months! And I am told “we” saw 2 movies about the Tooth Fairy, but I don’t remember being at the theatre once!
  11. A bag piper, amazing Lego doesn’t make a violin or flute for Emma and Abby.
  12. My favorite memories are always at the beach… so you will find me kicking back with my empty glass, while I watch a surfer for all the boogie boarding the kids did, Jack building a sandcastle, and the two girls on bikes on our 9 mile bike ride to get ice cream on St George Island.
Wishing you a Merry Christmas and Happy New Year this year and “Mini” more!